After another year of drought, I started to investigate gardening styles that use less water. I live in North Texas and our summers can be brutal even without a drought. We have been in a twice per week water ration for a couple of years now and so I thought it time to investigate gardening alternatives.
Old German Farming Technique
I came across an old gardening technique called ‘hugelkultur’, that has the benefit of drastically reducing the water to maintain it. The exact origins are sketchy but from I can find, this was an old German farming technique. It would provide both a way to dispose of larger pieces of wood and branches as well as building up the nutrients in the soil.
Rotting Trees
Simply put, it is taking old decaying wood and burying it under the soil, then planting on top. I can see a couple of ways that hugelkultur would come about. Using old, dead rotting trees that would be very difficult to move is one way it could have happened. The other way may have been after clearing a wooded area, piling up the unusable wood and branches without burning them up. What they would be doing, in essence, is composting this organic material to create a long term nutrient feeding source for their crops.
Creating Windbreaks
One of the interesting concepts about this gardening technique is that you can create natural micro-environment areas within the garden with these mounds. Depending on how they are orientated, you can have plants that need less sun on the north face and full sun on the south face. Plants that are more delicate than others may be able to utilize the mounds a windbreaks.
Trench vs Mound
There are a couple of different ways to construct a hugelkultur. One of the more common methods which utilize existing soil is to dig out a trench 1 to 2 feet deep, fill the trench with rotting wood, branches, and logs. The basic idea is to lay down the largest wood on the bottom, next medium size logs or branches and then twigs. What you just created is an airy environment for the roots of your garden. On top of this, add some grass (this can be clippings or sod that is overturned on the pile) or straw, add some leaves, then add a layer of compost and top it off with the dirt from the trench.
Remember you have built a mound that is close to 3 times the area you dugout. Be sure to water each layer as you go to help maintain the moisture throughout the pile. It is not uncommon to make a hugelkultur bed 6 feet tall with the trash wood taking up most of the space. The woodpile maybe 4 to 5 feet tall. So with some of the pile buried, you can reduce the overall height without reducing any of the benefits.
Increase Garden Space
Instead of just planting just on top, you plant all over the mound. This increases your garden area without using up extra land. In the first year you will have to water as usual. As the wood decomposes it will act like a sponge and absorb the water as it trickles down.
With each progressive year, the wood decomposes more and more and will be able to water the roots. Experiments have been done to show how the plant roots will attach themselves to logs and be able to have a constant supply of water.
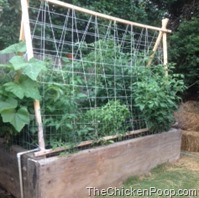
Another way to build the mound is right on top of the ground using the same building technique. I have built my raised bed garden box because I have an extremely small space and this helps corral it.
Lots of Science
The more seasoned the wood, the better. As the wood decomposes the organisms need nitrogen to build cell structure. Wood is considered a carbon source that organisms use for energy. So by using seasoned wood some of the nitrogen needs have been met.
What I have just described is the “textbook” hugelkultur recipe. As I have said before, I have a very small yard and chickens. I needed to design a bed that uses a very small footprint and I could protect from the chickens. This year I have two raised beds 7′ x3’x2′ feet. I half-filled up the beds with rotten wood. Then I layered leaves, grass, alpaca manure, compost and dirt from an old garden I had.
If at First you don’t Succeed…
I will be using compost that I have been producing as mulch once all the vegetables are established. One of the reasons I started with leaves was so that I could fill in a lot of the holes around the wood. Any holes or low spots I will fill in with compost. I built these two beds in December so that it would have time to start composting and settling before my first plantings in February
Last time I tried this method I had limited success on one of the beds. The reason I redid this because I only had about 3 or 4 inches of soil material for the plants to grow in. When I pulled the tomato plants at the end of the fall, I noticed that the roots were not as large, volume-wise as my plants that had 1.5 feet of soil. I broke the bed down and rebuilt it with less wood and more soil and amendments. I am very excited to see if this program is going to work as well as everything I have read says it will.
The best way to garden is to put on a wide brimmed straw hat and some old clothes.
And with a hoe in one hand and a cold drink in the other, tell somebody else where to dig.

Pingback: Huglekultur Raised Bed Garden |