Around three years ago we decided we wanted to raise chickens. If you have read any of my previous articles you will see what a relatively quick coop and run I put together. We bought the coop online and it was cute. I built the run and truth be told: it was ugly. I just didn’t want to spend a lot of time and money on something that may not be a long term desire.
After losing three of the original five girls to possums (they are just plain mean suckers) our enjoyment hasn’t waned; it has just grown. We recently decided that instead of fixing the defects in design it was time to just start over.
Run=Ugly
My wife finally shared with me that she thought the run was really ugly and that she wanted something a heck of a lot more attractive than what she had to look at. Plus, I think she could see I was getting very antsy not doing anything after a very busy spring redesigning the front yard (another story sometime).
I was going to build from scratch and create my own unique design (and probably spend way too much money). I had the basic essentials (waterer, feeder, etc) so all I had to do was build around these things and I would have a new coop.
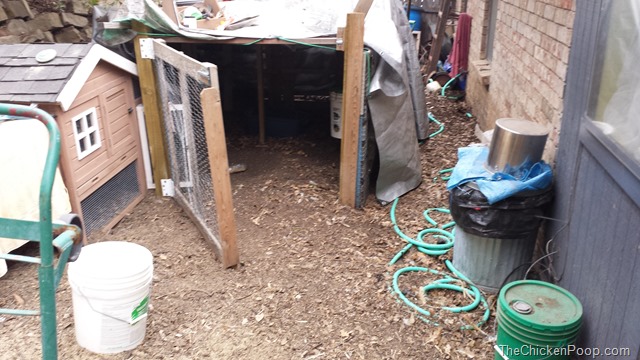
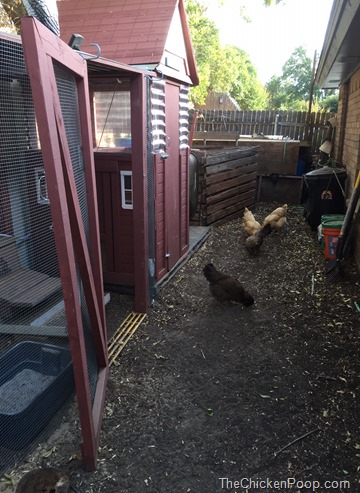
The wall next to the house: Before and After
As you can see, the tarps and buckets were taking over the small space. But even my wife will admit, the run did keep the girls happy during wet or bad weather.
Pinterest for Ideas
I spent a good deal of time and scoured through various articles in Backyard Chickens and Pinterest trying to come up with the perfect idea for our backyard. I guess I should mention that my wife loves to watch the girls out of her office window. Of course, the girls also love to tell her when it is time for a snack whenever the backdoor is open.
A Friend Helps
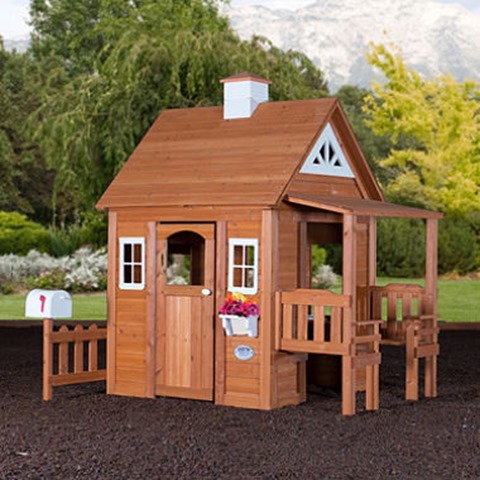
I have always believed the good Lord will provide when the time is right. About a month ago I told my best friend my plans to build a new coop. He told me that his adult daughter had a playhouse that she was ready to get rid of because her daughter had a new play/gym house. He sent me a picture and I immediately saw possibilities. It was definitely smaller than I envisioned but I thought I could make it work. I picked it up and brought it home.
The Build Begins
The first thing I did was temporarily put it together (without the roof) so that my wife and I could figure out what to do with it. It is important to understand that the dimensions were approximately 43”x 43” x 62” tall. It was way too small and I wasn’t going to fit in it to be able to do the chores needed. One of the biggest problems with the old run was it was too short to get into and stand up. I was tired of doing the crab walk!
The Floor for the Chicken Coop
I am a collector of building materials. I had been given a 4’x8’ pallet with OSB board on it. At the time I didn’t know what I was going to do with it. When I got the playhouse, it fit on the pallet with room to spare. We tore down the old run, moved their coop and I started the project.
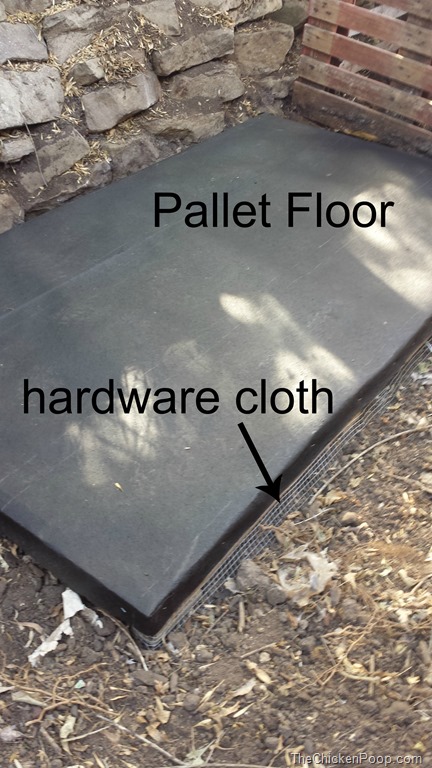
I first leveled the ground for the pallet. I took ½” hardware cloth and wrapped the pallet below grade to minimize digging from unwanted critters under the pallet. I had some reinforced vinyl that covered the pallet to make it weather resistant and prevent splinters into the girls’ feet. I left playhouse put together off to the side so that the girls would get use to going into it and on it.
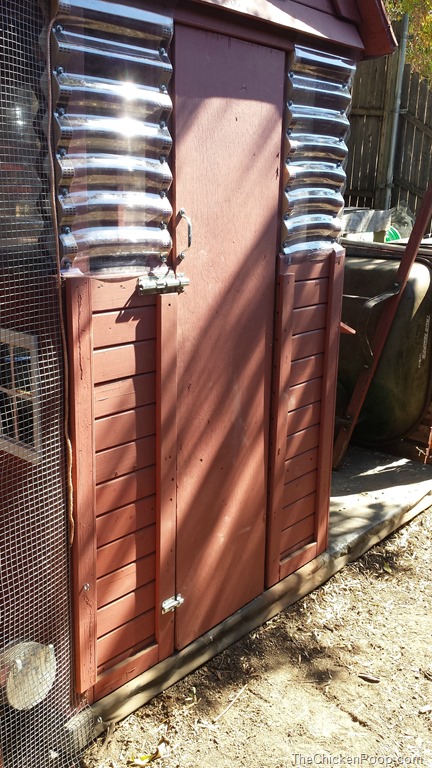
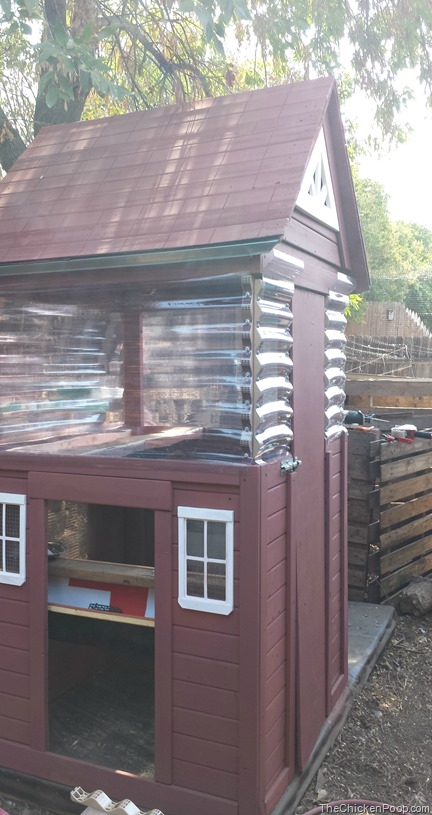
After the pallet was ready I moved the playhouse onto the pallet. Time for the real work to begin. The first idea was to raise the roof about two feet so that I could stand up in it. We decided to use transparent corrugated roofing panels for the wall extension. We used panel closures on each end to minimize any drafts.
The Roof of the Chicken Coop
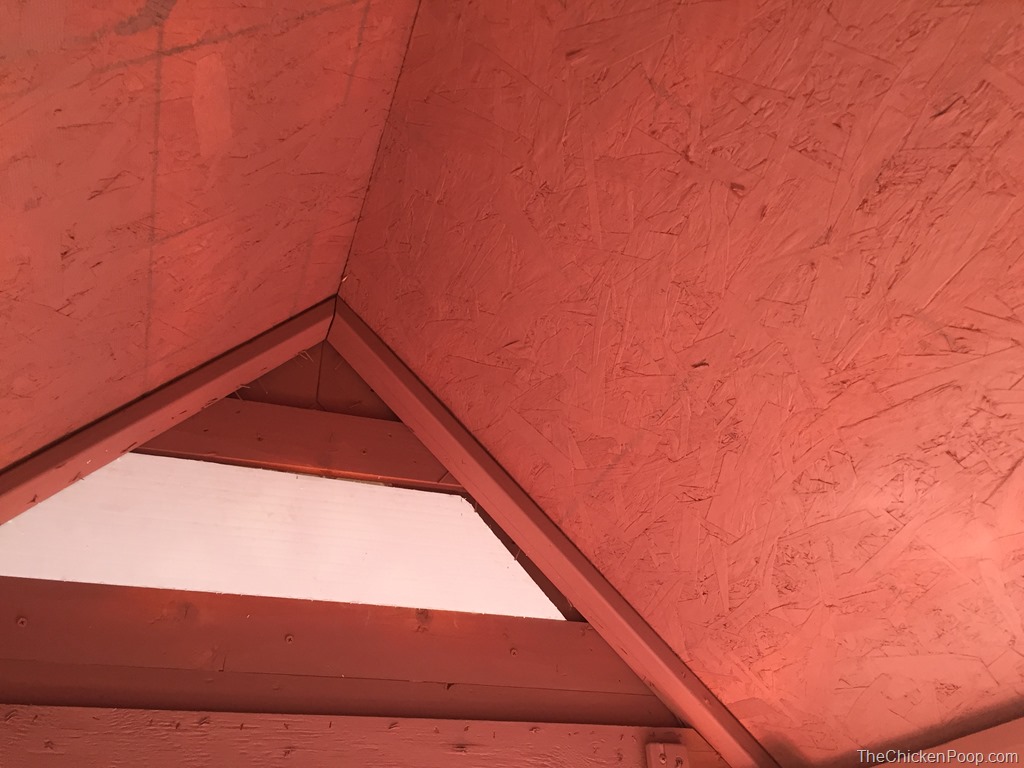
Next, I stripped the “shingles” off the roof, rebuilt it with plywood and tar paper to make sure it was dry inside. I reinstalled the “shingles” and the roof was ready. I used 2×4’s like the support legs. I used bar clamps to set the roof.
I put the clamps at the desired height, my son and I lifted the roof over the supports and set them on the clamps which made adjustments very easy. The actual opening was 21.5 inches to account for the overlap of the panels on top and bottom.
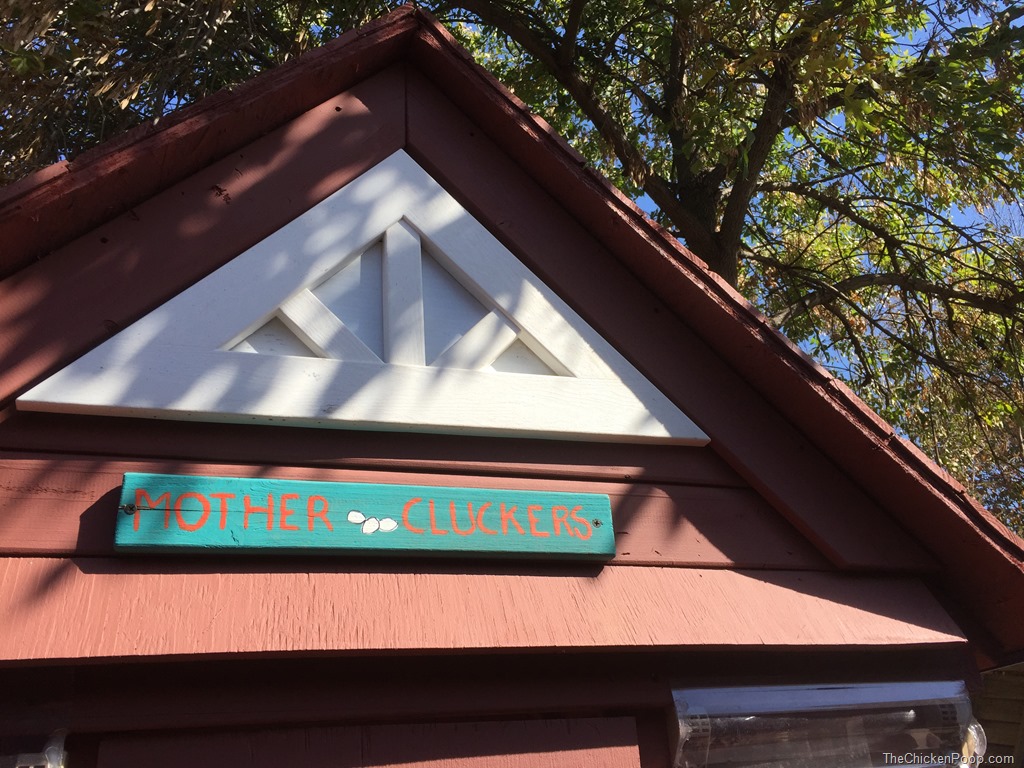
We closed all the openings and added some decorations.
Chicken Nesting Boxes
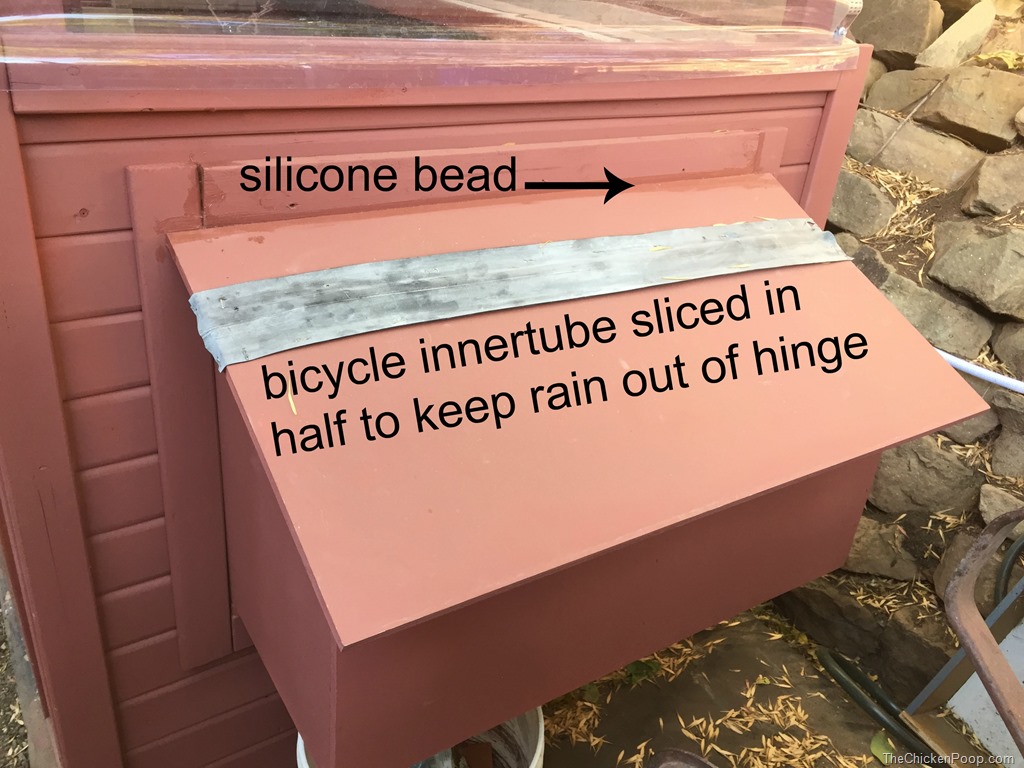
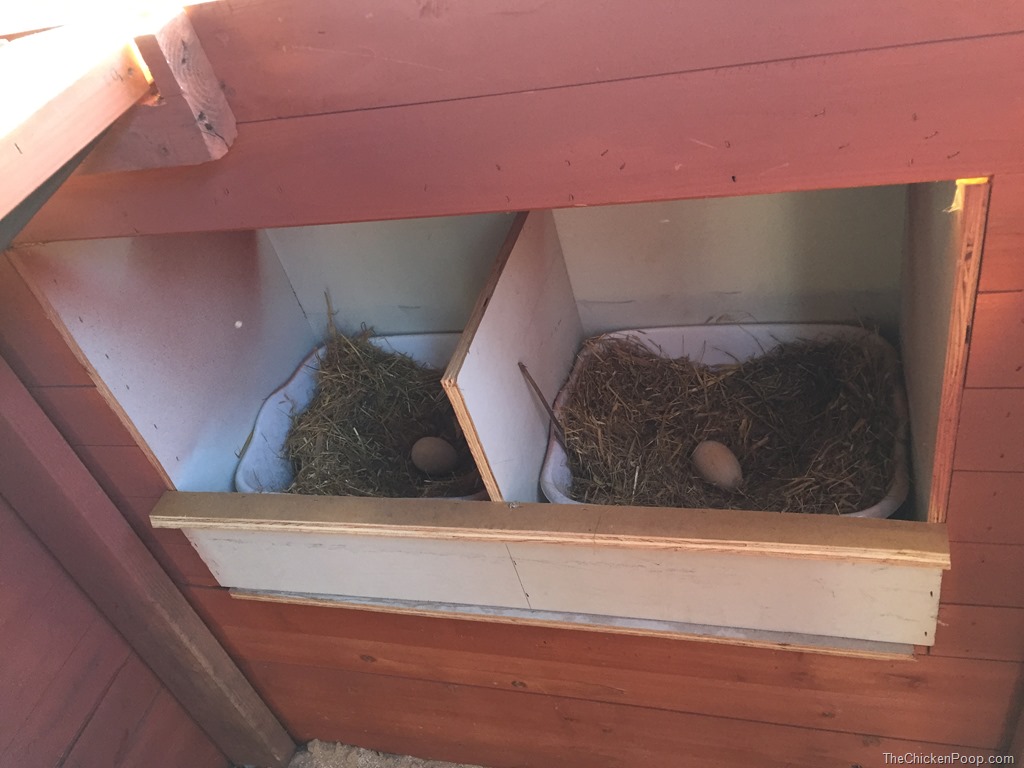
The first item was to replace two of the four small windows and build two nesting boxes for them. Because of the small size of the original coop, there wasn’t any room for a nesting box on the inside. The girls would either lay under the old coop or hide the eggs. As soon as I built the box they took to it, even with all the noise from construction.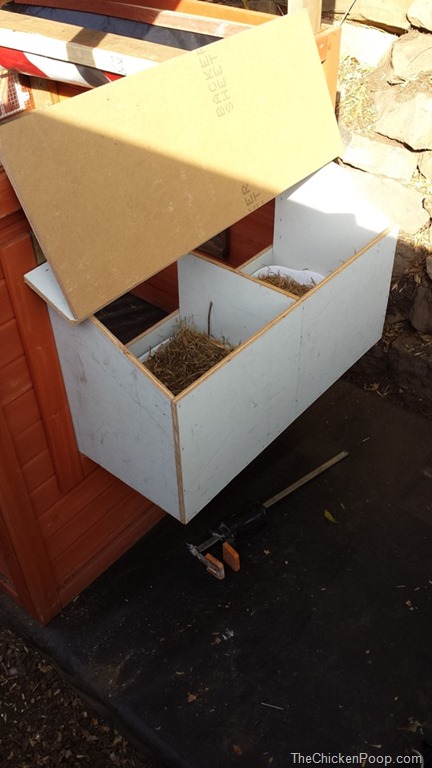
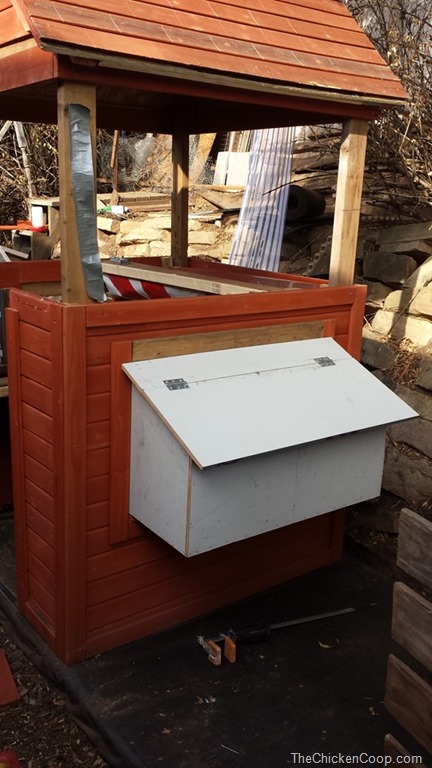
A hinge makes it easy to collect the eggs from outside the coop.
A silicone bead along the hinge and along where the box is attached helps keep the water out. But the innertube on the hinge should really make the difference. Our first rain is this week and we will know for sure.
Here is a view of the nesting box from inside the coop. We have wooden eggs as recommended. The girls took to the new boxes without any problems.
Chicken Poop Hammocks
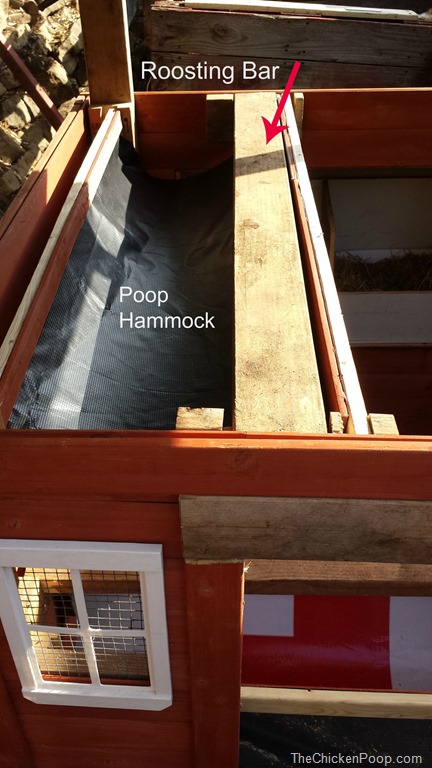
The girls were still not sleeping in the new coop because I didn’t have a perch for them. I wanted to make an easy to clean system. I knew I would be using sand on the floor but I still didn’t want to get on my hands and knees so I added small poop hammocks behind each roost bar. Occasionally they sleep the opposite direction but for the most part, they have performed as expected. They and the roost bars are removable for easy cleaning.
The Chicken Coop Doors
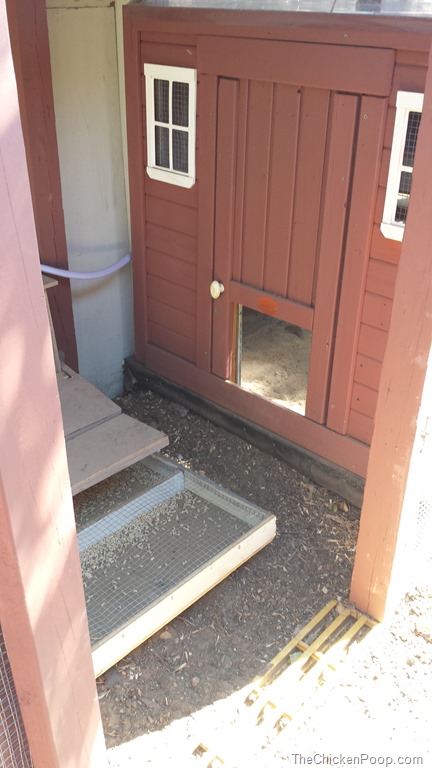
I needed to build doors before I let the girls sleep in their new digs. The playhouse came with two openings for the kids. One was just a 43”x 17” opening and the other was a43”x17” opening with a little door and window in it. The opening became my door so that I could install a full-length door albeit only 17” wide.
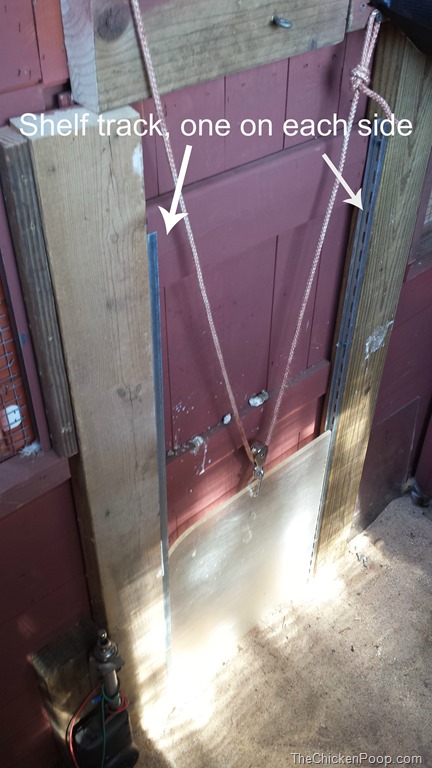
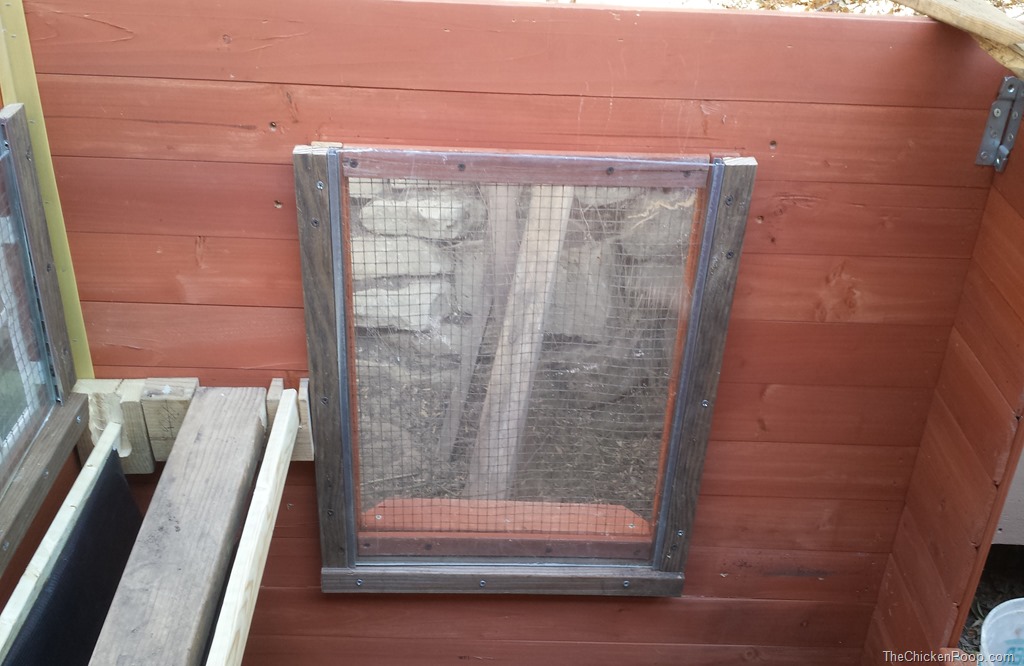
On the girl’s door I took the play door out turned it upside down and made the window the new chicken entrance. To close the door I used single shelf tracks and cut them to size. Much cheaper than using “C” channel. I had an old rigid chair mat that I cut up for the door so that it slides up and down. I am in the process of building an automatic door opener out of a car antenna (still have a few bugs to work out).
You can see the transparent corrugated roofing panels that enclosed the Coop extension here. This makes it bright for the chickens while they are in their coop during inclement weather.
Here is a good view of the transparent corrugated roofing panels before the chicken run is attached.
The Chicken Coop Windows
There were three more windows that I kept intact. I put ½” hardware cloth over them and then attached two tracks to each one so that I could install clear Plexiglas when the weather turns colder and wetter. I am leaving them open now while the weather is nice.
The Run
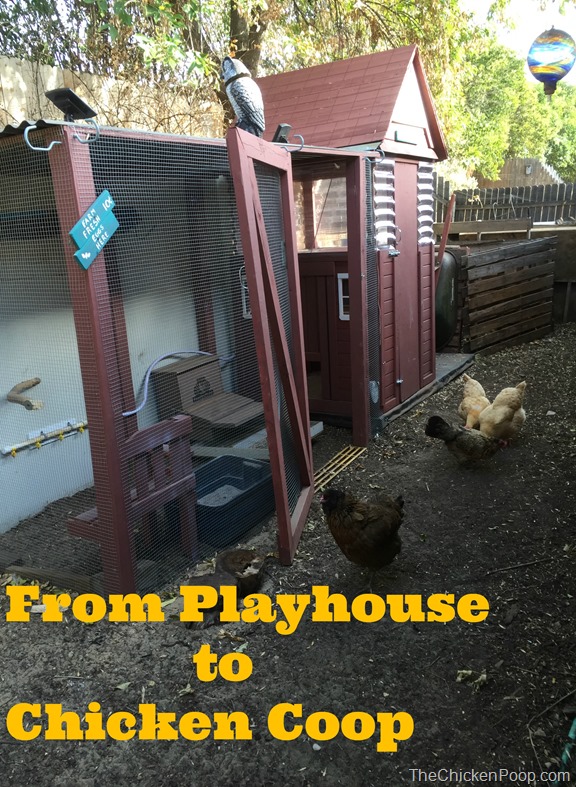
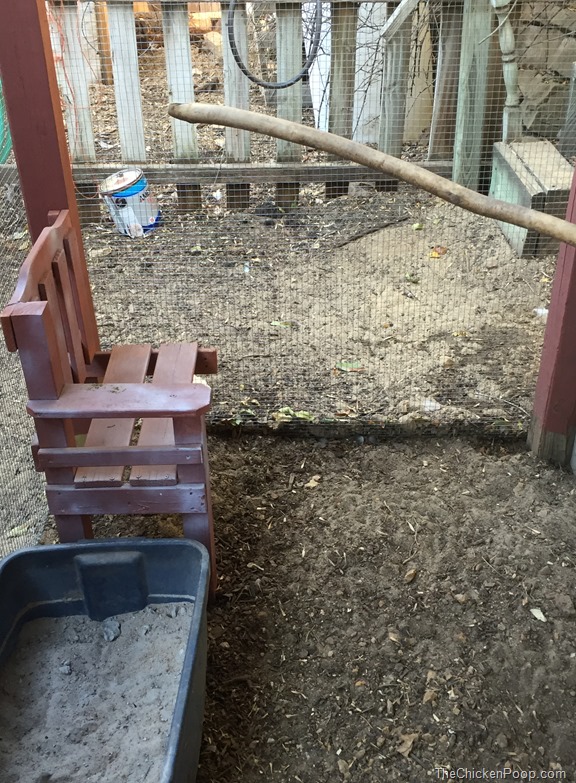
I purchased 48” wide hardware cloth so that I could build the chicken run without any overlaps. The run is 4’x8’ which is small for 4-6 chickens but girls are only in there when the weather is bad. I covered the chicken run with polycarbonate roofing panels to keep them out of the rain and hail. I used plywood for the back as a wind and rain screen. I built a two and half ft. wide door so that this winter I can put a hay bale inside to help keep them out of the mud.
We added a bench from the old playhouse front porch for a perch along with a branch. We also have a dusting box with sand and ash. They use that every day.
Water and Feed
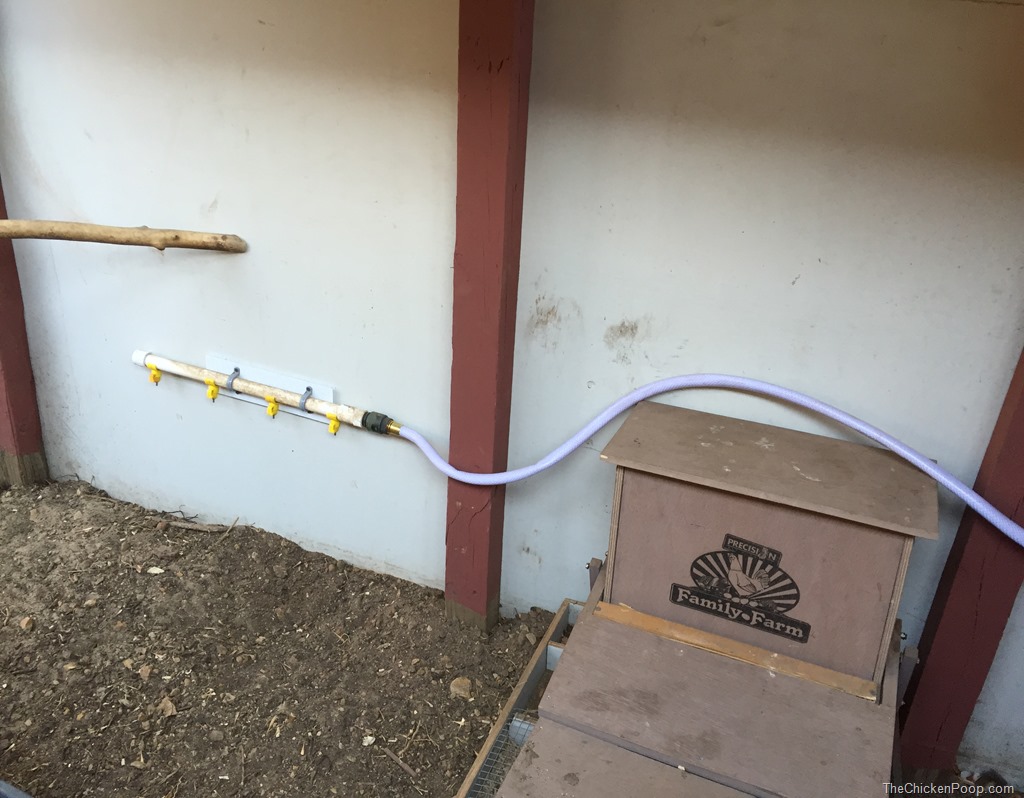
I attached the waterer from the old run to the back wall and kept the bucket outside. I decided to keep the feeder in the run because of room as well as keep rodents away from the girls at night.
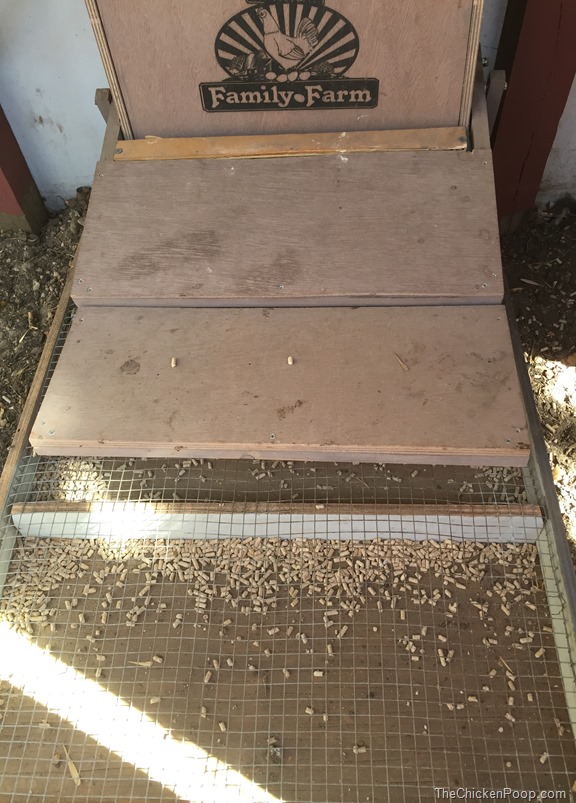
Another thing that I built was a feed catcher. My girls are very sloppy and throw food out of the feeder. This was adding to the rodent problem. Now I can recycle the feed back into the feeder. I already see savings!
Weather Protection
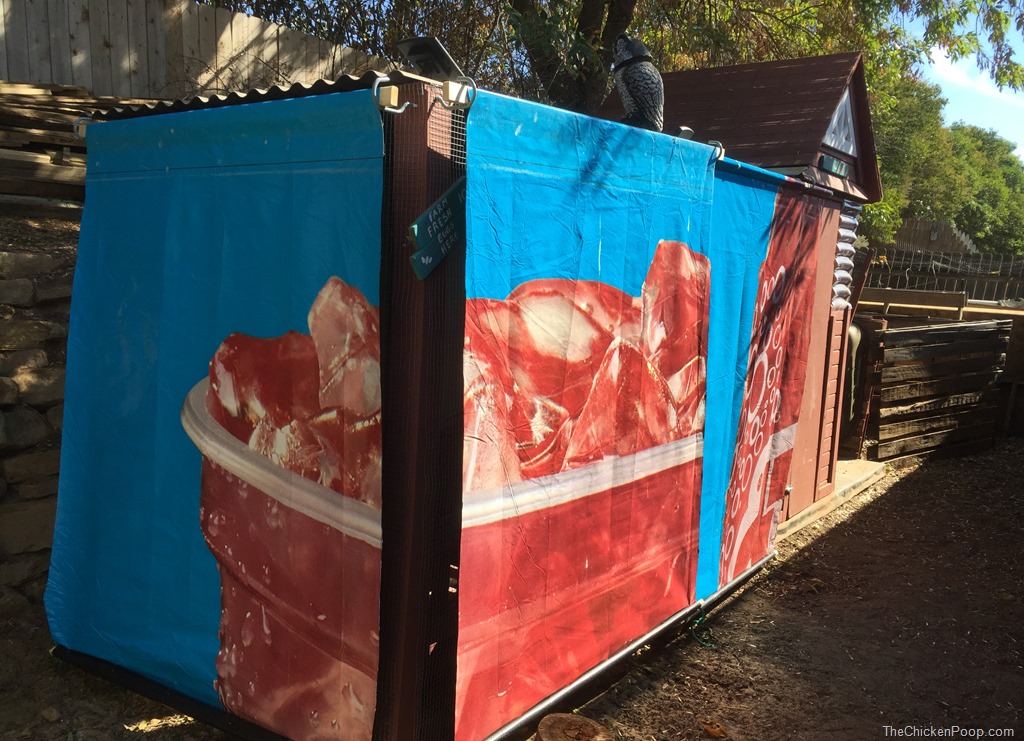
With the reinforced vinyl, my wife came up with the idea to make a removable wind/rain screen on the screened sides. We hang them on the outside of the chicken run during inclement weather. They tie off at the bottom with bungee cords and eye hooks.
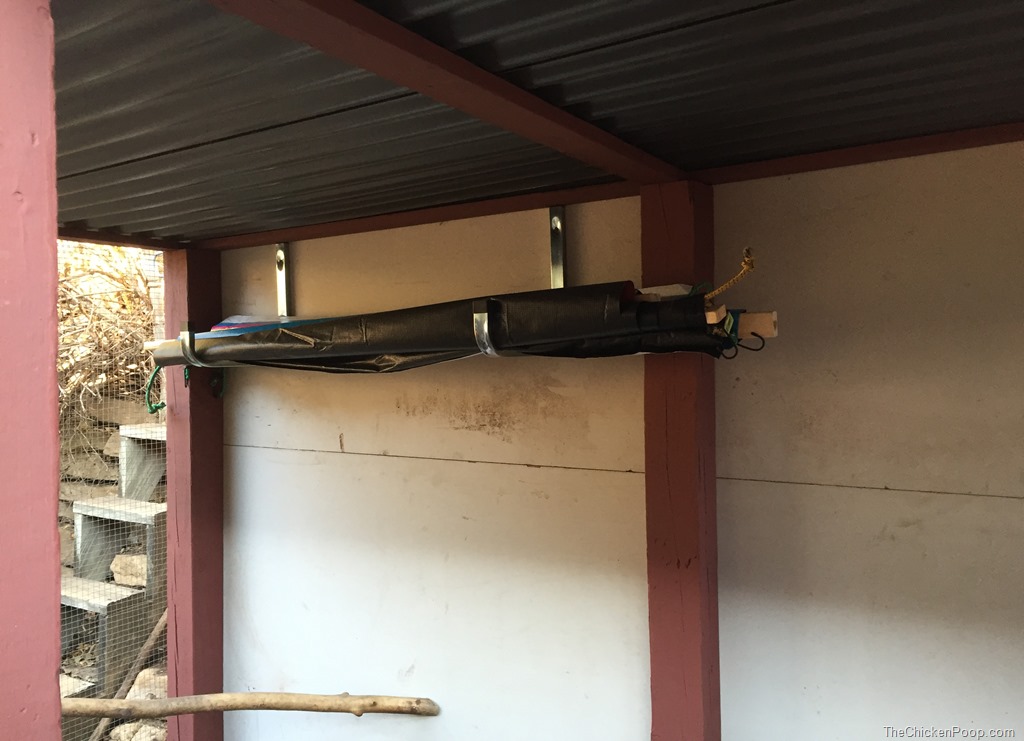 During good weather, we roll the weather protection screens up and store them inside the run out of the way.
How Much Did This Puppy Cost????
And for the final question, you might have…how much did it cost? Well, remember that I got a $600 playhouse for free. I also mentioned that I am a collector of building materials, so all the wood you see in the photo above, free. I did sell the old coop on craigslist for $125.00 so that offset a lot of the cost. I paid for the hardware cloth, the roof panels you see above in the run and the transparent corrugated roofing panels. I also had to buy the panel closures for those panels on the coop. I bought some odd and end pieces of hardware like the brackets you see above. I did reuse hinges and door latches from the old run. I had to buy the shelf tracks for the doors and windows, but I had the Plexiglass and I had the plywood for the coop roof. Let’s see, what else…oh, the door lifting system that doesn’t work yet. That is a whole other article. As soon as it is up and working, I will let you know all the details. But at this point, I think I am out about $75 bucks.
Best of all, my wife is very happy with it.
Pingback: A 700 Square Foot Chicken Run! |
What is the poop hammock material made from? And how easy it is to clean? I’m in the process of building a new coop and wanting to protect the floor as much as possible from rotting away